SM-Marks Online 10 Minute Guide
If you already use SM-Marks, then you know many of the basics about SM-Marks Online. The organisation of SM-Marks Online copies the arrangement of the desktop program, but there are differences because of this being an online markbook in a web browser that allows the sharing of markbooks.
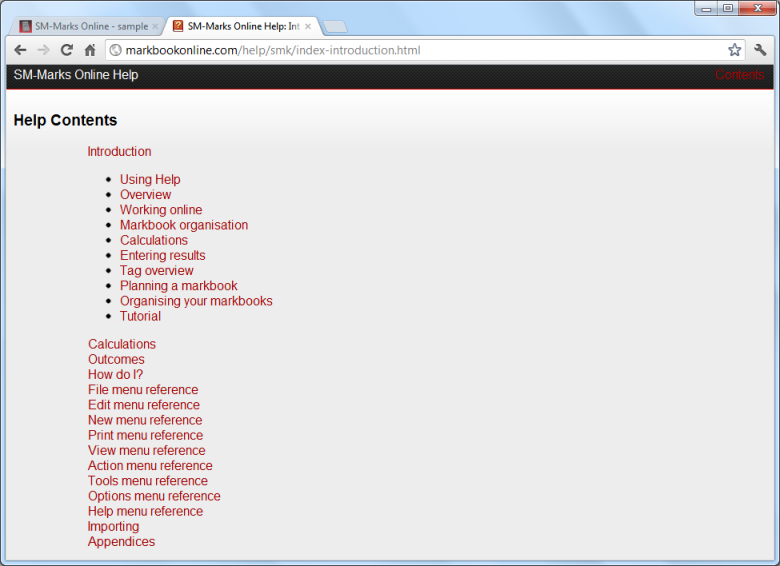
Reading this guide and examining the pictures takes about 10 minutes and is recommended before using SM-Marks Online for the first time. (If you have not used SM-Marks before, please go through all the topics in the Introduction section of the help after this.)
The main view in SM-Marks Online.
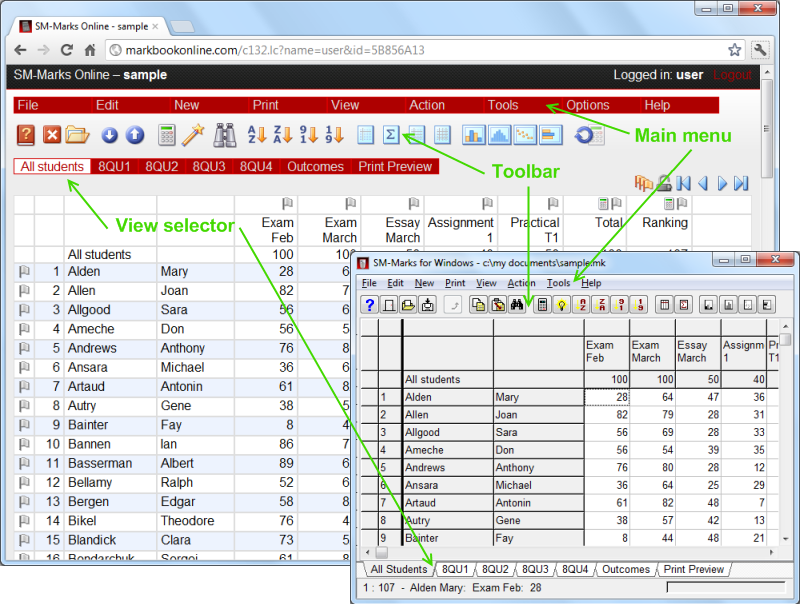
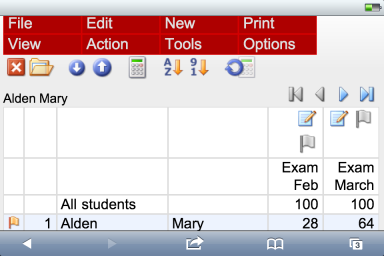
As you can see the layout is very similar to SM-Marks as shown in the corner. There is the Main menu, the Toolbar, the Class selector (also called the View selector) and the main area with the grid. If you use SM-Marks Online from a small mobile device the interface is simplified to fit the small screen, and using it in landscape orientation is recommended for smaller screens. The rest of this guide refers to the normal large screen markbook.
A difference from SM-Marks is the column selector.
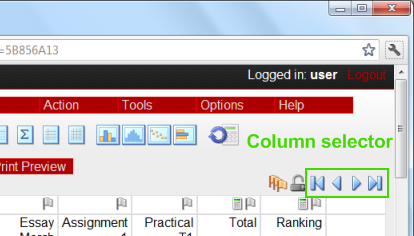
This changes the tasks shown in the main area. You can show the first or last group of tasks, and with the middle arrows, show the previous and next group of tasks.
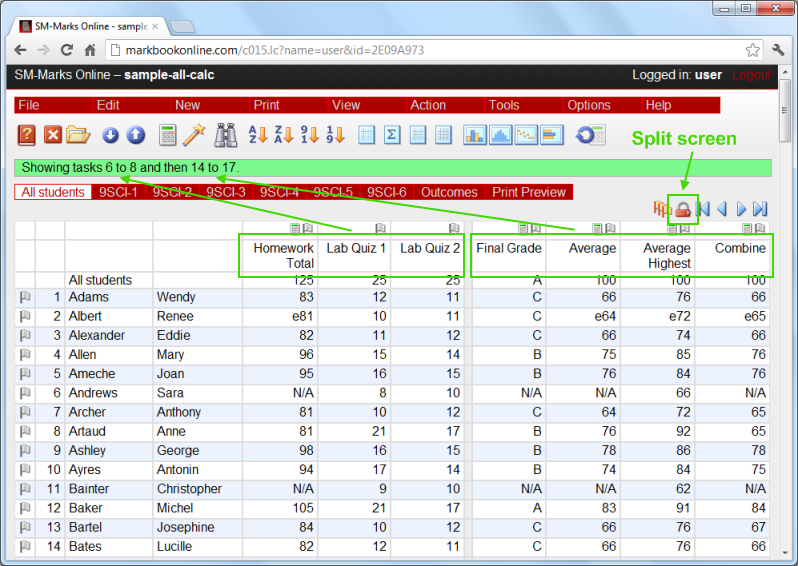
The column selector allows you to split the columns with the tasks, so a number of tasks on the left are fixed in position and do not scroll. This allows easy viewing of tasks that are not adjacent in the markbook. Clicking on the icon again removes the split.
When you first login to SM-Marks Online you don't go straight to the main area, instead you see a view similar to this, depending on whether you are an administrator and whether you have imported any markbooks.
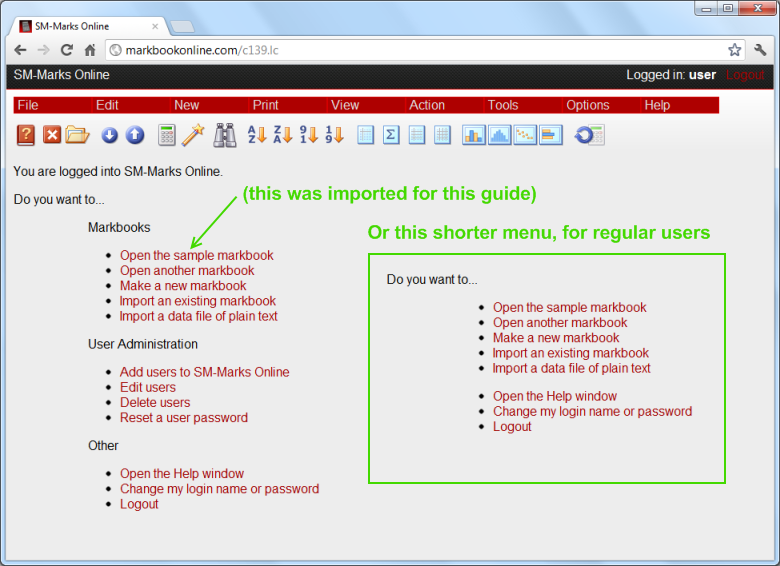
If you have a markbook open, to go back to this initial menu, just close that markbook.
Editing results in SM-Marks Online is different.
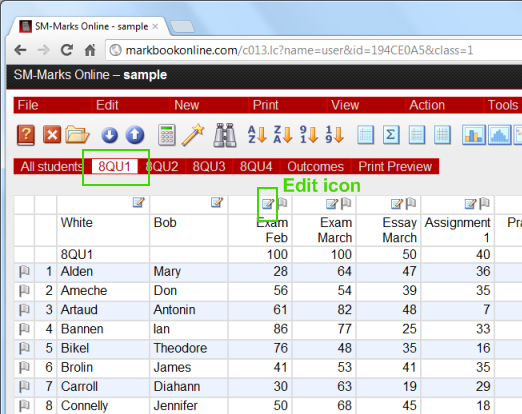
To edit the student names you should first select a specific class and then click on the edit icon at the top of the column. Editing of results is allowed when viewing All students, or a single class. Unless you are entering results across more than one class, selecting a class before clicking the edit icon is recommended. Markbooks are shared with other users in your faculty, so there is a time limit on how long the editing session stays open.
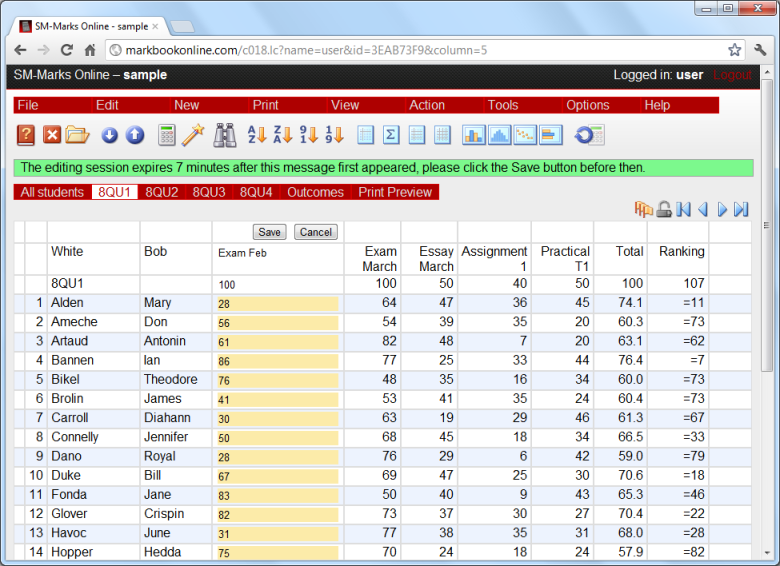
Imagine if someone else (not you) opened a markbook, started editing and then left for the weekend (or went on a holiday) without closing or logging off. To prevent the problem that this (and less dramatic events) could cause, with you locked out of a markbook, an editing session and your login expires if you don't do anything with the open markbook.
Or course, after clicking the Save button before the ten minutes pass you are free to click the edit icon again and keep working in that class, or select another class to edit.
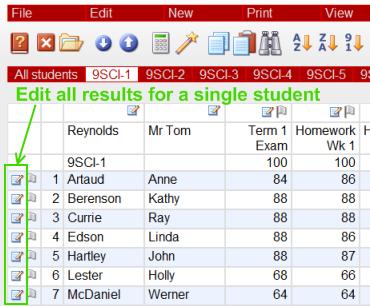
Sometimes you want to enter more than one result for a student. Instead of selecting each task column to edit, clicking on the Edit icon next to the student's name shows a view with all the tasks in the markbook so you can entered results into any task for that student.
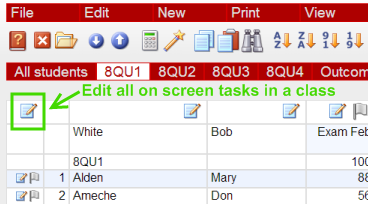
If you want to edit more than one task at a time, select a specific class and then click on the edit icon at the top left of the grid. This shows a view with all the currently visible tasks (that do not have a calculation, or are locked) as cells you can edit.
Sharing markbooks and opening them at the same time as other teachers is allowed in SM-Marks Online.
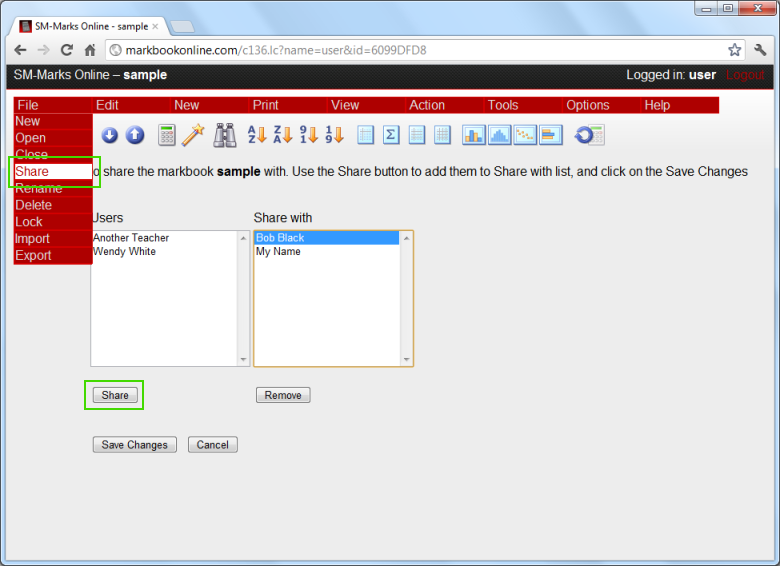
When you create a markbook, only you can initially open it. With the Share command you control who else can open that markbook. No-one else in your school can even see the markbook without your permission.
If you have the job of making a markbook for another faculty (lucky you), then after you make the markbook you can transfer ownership to any other teacher in your school.
That person then becomes the owner, and unless he or she chooses to share it with you, then you can no longer open that markbook.
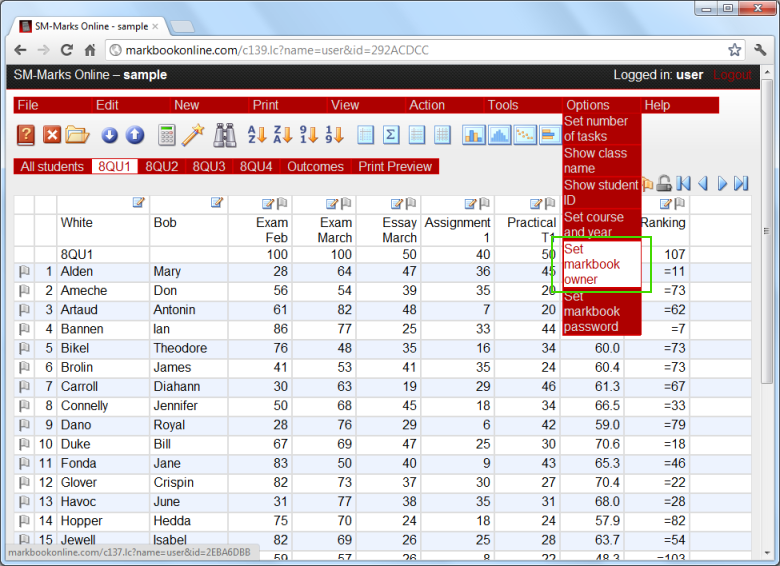
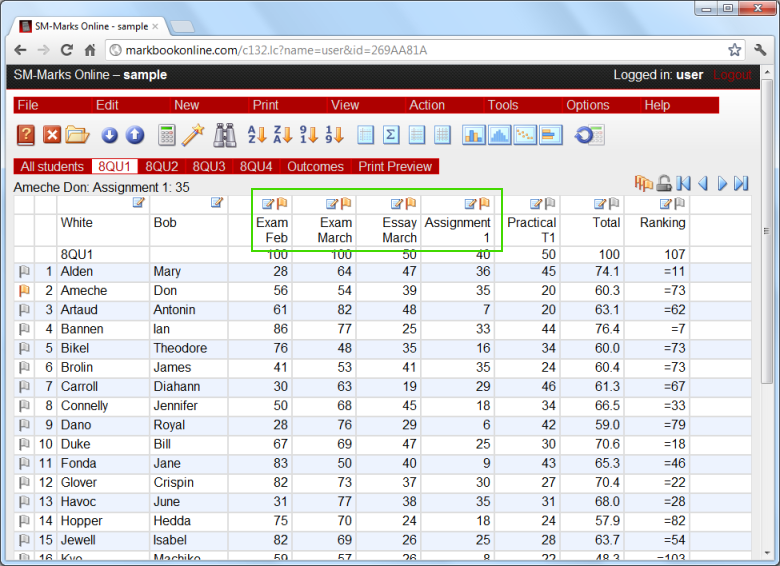
Tagging in SM-Marks Online is necessary to indicate the student or task that is affected by the next action. Clicking on a flag icon colours it to show the item is tagged, and the currently tagged student and task is shown below the class selector.
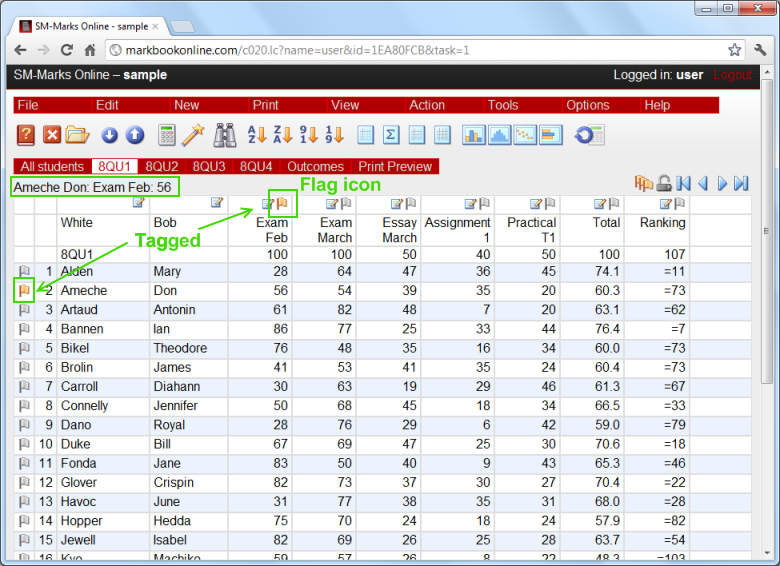
Then when you next choose an action such as Edit, New, Student or Edit, Calculation it is the tagged student or task that is acted on.
More than one task, and student, can be tagged at a time which is useful for an action such as Print, Marks, but sometimes it is more convenient to have the previous tag removed as you tag a new item.

At the left end of the column selector, there is an option to switch between tagging multiple and single items. When the icon has a single flag, as an item is tagged, any previous tags are removed.
You can edit a calculation by tagging a task and choosing the Edit, Calculation command, but there is an easier way.
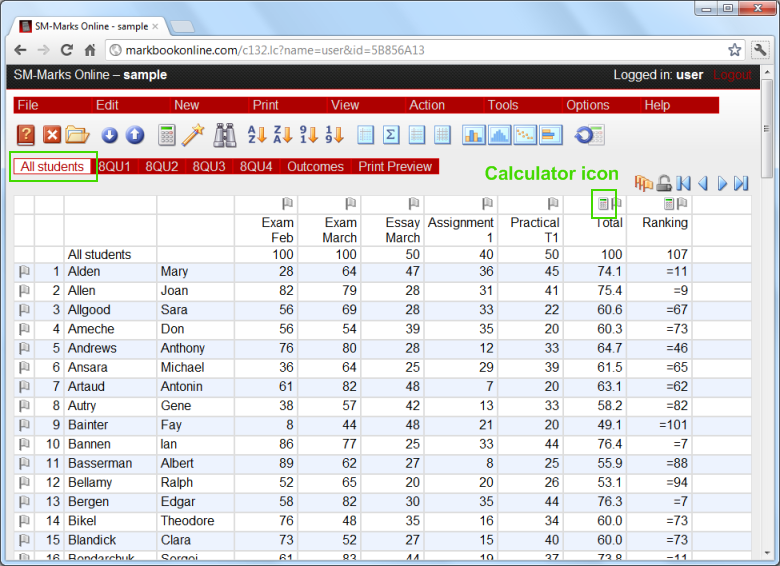
By switching to the All students view, click on the calculator icon at the top of the column to show the Edit Calculation view.
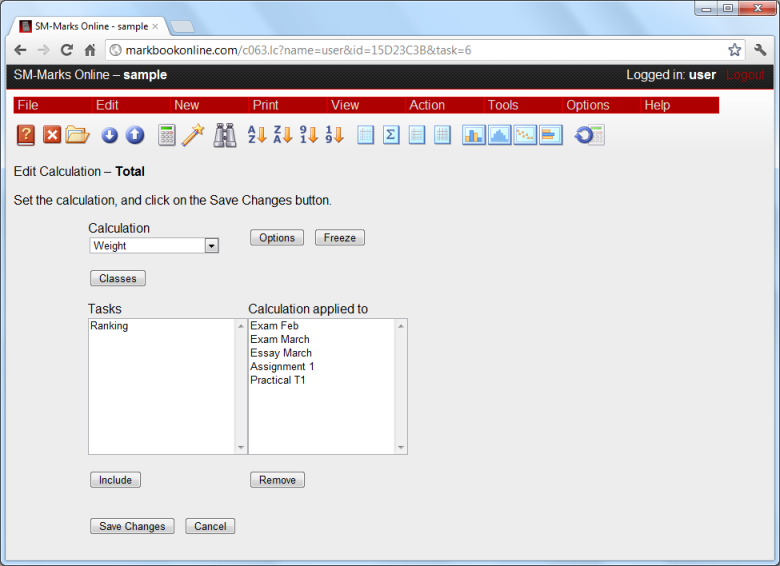
Which looks very similar to the Edit Calculation dialogue in the desktop version of SM-Marks. And has all the same calculations, of course.
There is a new approach required for printing because SM-Marks Online is running inside your web browser. Here is Print Preview view after tagging some tasks and choosing the Print, Marks action.
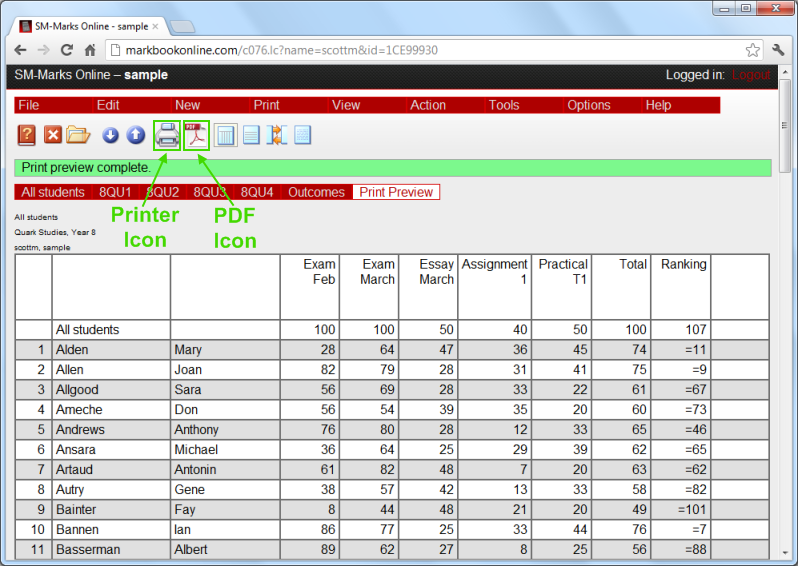
Clicking the PDF icon on the toolbar opens another tab in your browser, or depending on the browser it may be a new window, with the pages as a PDF file. These are printed with the PDF plugin of your browser or viewer.
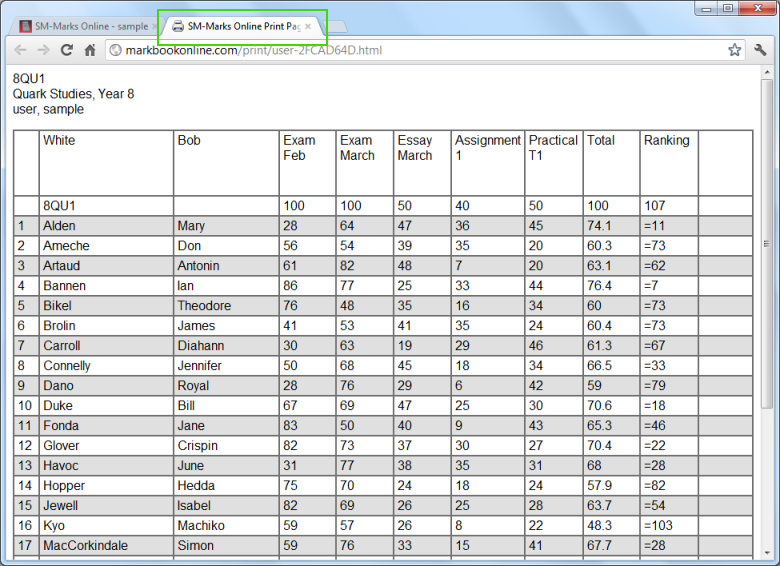
Not all of the Print commands have the PDF option. Instead Clicking the Printer icon on the toolbar opens another tab or window in your browser. This is suitable for printing and the Print command in your browser can then send the page to your printer.
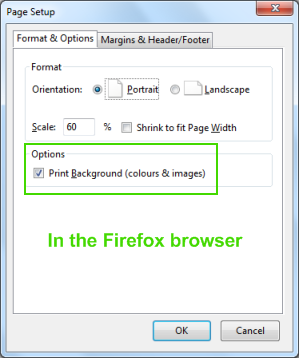
If you use the Firefox browser, note that it does not automatically include the shading of alternate rows when printing. So in the Print, Page Setup command turn on the Print background option if this is your browser. While the Chrome and Safari browsers don't print the background shading and do not have an option to change this.
Ten minutes is almost up and you now know enough to continue with SM-Marks Online, and don't forget the Help, Contents command that has many more details about working with SM-Marks Online.