Importing
ERN files
To import class lists from ERN requires three csv files that must be named:
- ERN-TEACHER.CSV
- ERN-CLASS.CSV
- ERN-ROLL-CLASS.CSV
These three files are imported with the Import School Data command.
The three csv files are made in ERN using the Excel export facilities of the "ERN – Enrolment and Registration Number" application of the NSW DET Web Portal.
Creating ERN Teacher File
- Open the DET Web Portal and click on the "My Applications" tab, and the "ERN – Enrolment and Registration Number" application.
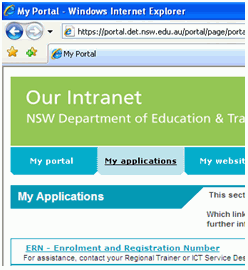
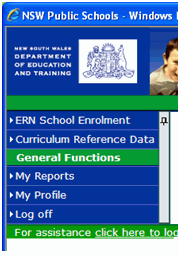
- Click on "ERN School Enrolment"
- Click on the "Place Management" menu item at the left and the "Student Group Offers" tab.
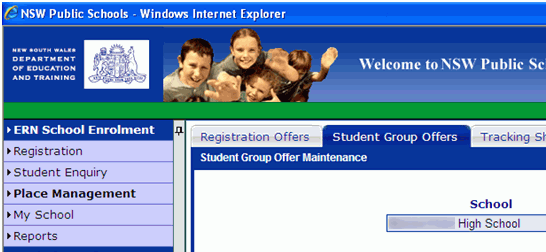
- Select the "Scholastic Year" required for example "Year 12" and select "Course Class" in the "Activity Type "list.
- Click on the "Go" button.

- Click on the small Excel icon to left of "Group Offer Name" to export the data to an Excel csv file.
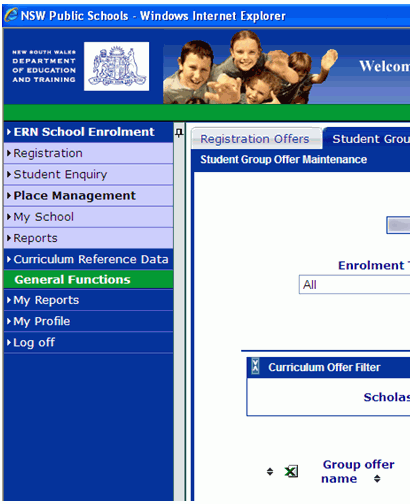
- Use Windows to re-name the exported file to ERN-TEACHER.CSV.
Creating ERN Class File
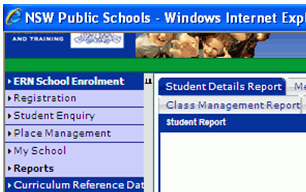
- Click on "Reports" menu item at the left, and the "Student Details Report" tab.
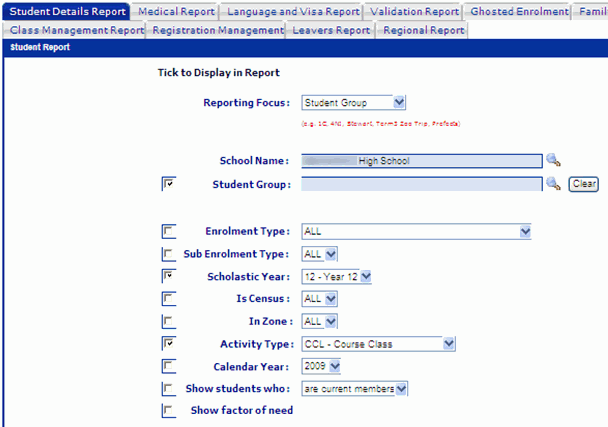
- Tick "Student Group" check box and do not write in the line.
- Tick the "Scholastic Year" check box and select the same "Scholastic Year" as in step 4.
- Tick the "Activity Type" check box and select "CCL Course Class" in the "Activity Type " list.
- Scroll down and expand the "Student Criteria" box.

- Tick the "Gender" check box.
- Scroll down and expand the "Report Schedule" box.
- Enter a report name, for example Classes.
- Select "CSV" in the "Report Format" list.
- Select "Exclude All Criteria" in the "Report Header Criteria" list.
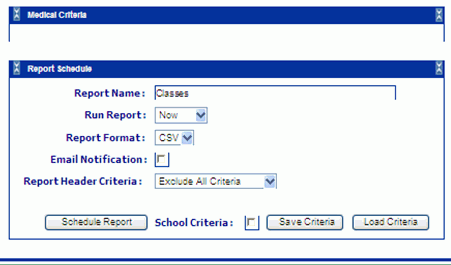
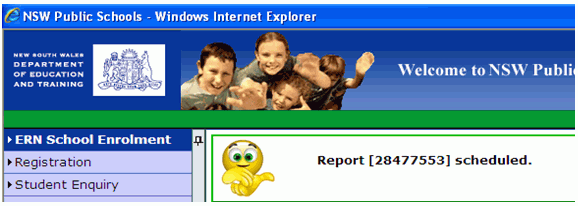
- Click on the "Schedule Report" button.
- Write down report number.
- Click on "My Reports" menu item at the left and wait until report is COMPLETED, to refresh the screen click on the "Go" button occasionally if the report is not complete.
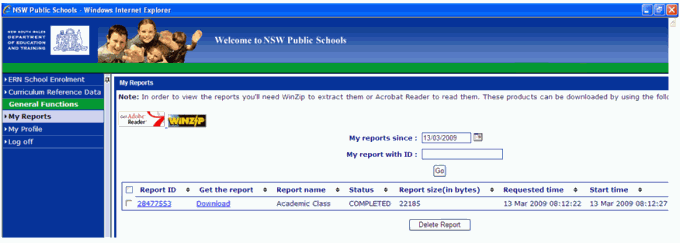
- Click on the "Download" link and click on the Save button to store the report as an Excel csv file.

- Use Windows to re-name the exported file to "ERN-CLASS.CSV".
Creating ERN Roll Class File
These steps are similar to making the ERN Class File, except the roll classes are exported.
- Click on "Reports" menu item at the left, and the "Student Details Report" tab.
- Tick "Student Group" check box and do not write in the line.
- Tick the "Scholastic Year" check box and select the same "Scholastic Year" as in step 4.
- Tick the "Activity Type" check box and select "ROL - Roll Class" in the Activity Type list.
- Expand the Advanced Student Criteria box.
- Expand the Student Display Fields box.
- Tick the Preferred Student Name check box.
- Scroll down and expand the "Report Schedule" box.
- Enter a report name, for example "Roll Classes".
- Select "CSV" in the "Report Format" list.
- Select "Exclude All Criteria" in the "Report Header Criteria" list.
- Click on the "Schedule Report" button.
- Write down report number.
- Click on "My Reports" menu item at the left and wait until report is COMPLETED, to refresh the screen click on the "Go" button occasionally if the report is not complete.
- Click on the "Download" link and click on the Save button to store the report as an Excel csv file.
- Use Windows to re-name the exported file to "ERN-ROLL-CLASS.CSV"
Problems importing
If the imported data is not correct or complete, it is recommended that you open each of the text files in Windows Notepad and check that the first line of each file is as follows.
- The lines may be shown over two lines, but if the word wrap is off would appear as one. In both files, the quotations are optional and are not required.
ERN-TEACHER.CSV
Group offer name,Academic Period,Curriculum Offer Scholastic Year,Curriculum Offer,Activity Type,Scholastic Years,Staff,Size
ERN-CLASS.CSV
SRN,First Name,Family Name,Student Group Offer,Activity,Scholastic Year,Gender
ERN-ROLL-CLASS.CSV
SRN,First Name,Family Name,Student Group Offer,Activity,Scholastic Year